Today I introduce a new series called Tiny Tutorials, aimed to give you small tips and tricks. For the first post, we will take a look at creating git tags from your pipeline.
Setting Permissions
Azure Pipelines automatically injects an auth token into your pipeline that is allowed to perform actions against Azure DevOps. We can use this token when we have set the correct permissions for the repository.
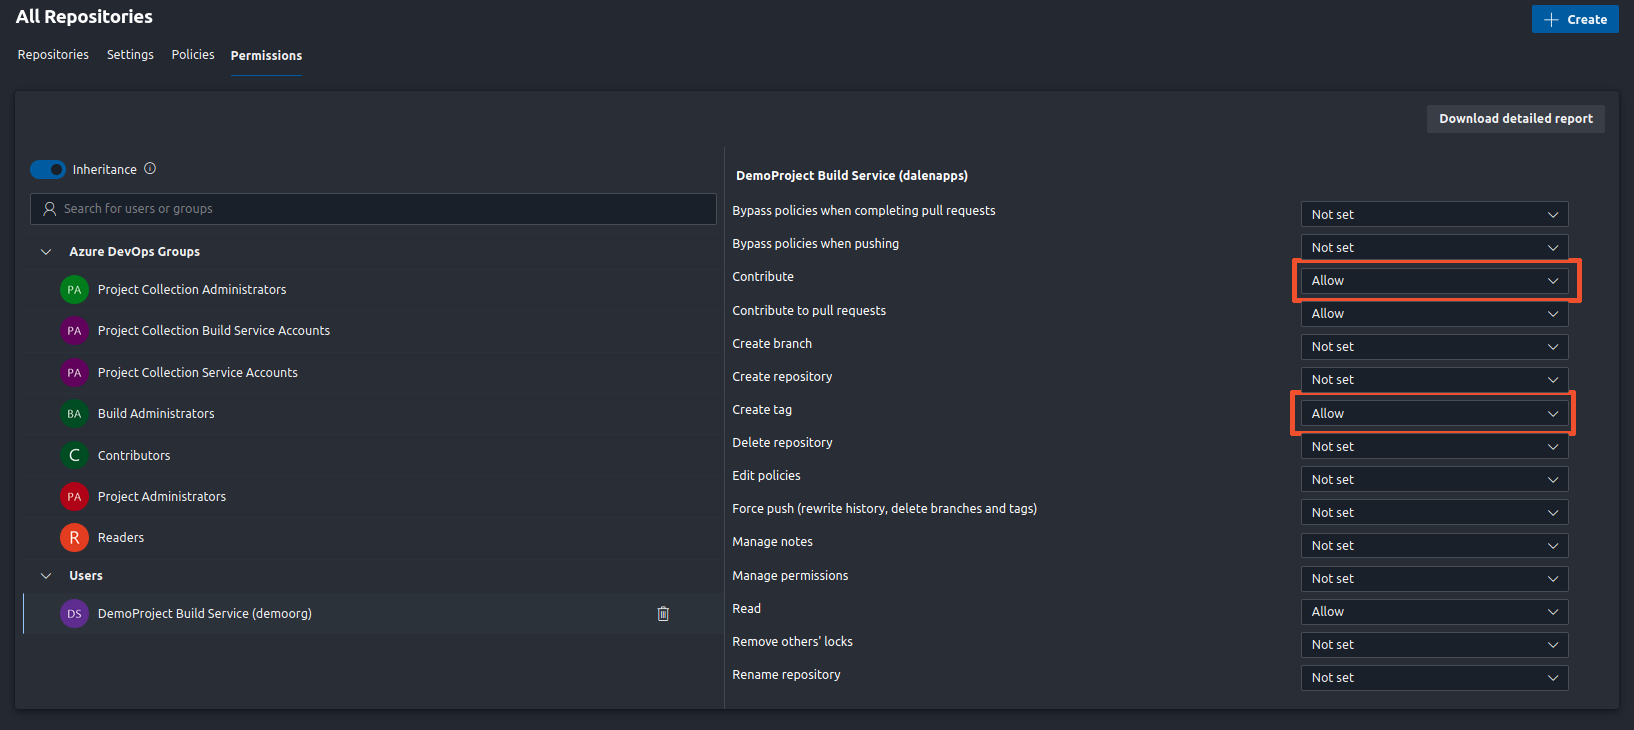
You can find the repository permissions under the following URL: https://dev.azure.com/{organization}/{project}/_settings/repositories (replace {organization} with the name of your organization, and {project} with the name of your project). Select your repository and click the Permissions tab. Under Users you should see a user with the name {project} Build Service ({organization}).
Ensure this user has the following permissions:
- Contribute: Allow
- Create tag: Allow
Git commands to run
To start, we need to set the default identity that we want Git to run under. This can be set by adding the following commands to our script.
![]() These values can be set to anything you want
These values can be set to anything you want
git config --global user.name "BuildService"
git config --global user.email "[email protected]"
With the default identity set, we can now create the actual tag and push it to the remote.
![]() You can use variables here as well
You can use variables here as well
git tag -a v0.0.1-dev -m "Development Release"
git push --tags
Configure the pipeline
Now that we know what commands to use, it is time to put them into a task in our pipeline:
- steps:
    - checkout: self
      persistCredentials: true
    - task: Bash@3
      displayName: "Create git tag"
      inputs:
        targetType: "inline"
        script: |
          git config --global user.name "BuildService"
          git config --global user.email "[email protected]"
          git tag -a v0.0.1-dev -m "Development Release"
          git push --tags
We also need to set persistCredentials to true in our checkout step. This setting leaves the OAuth token in the Git config after the initial fetch (defaults to false). For Classic Pipelines, select Allow scripts to access OAuth token. under the options tab.
Next time you run the pipeline, you should see a new tag created:

Converting it to a template
I use this task a lot and have it as a template that is shared between many of my projects. This makes changing the task a lot easier, as it only has to be changed in one place. Create a new yaml file with the following content:
parameters:
  - name: tagFormat
    type: string
  - name: tagDescription
    type: string

steps:
  - checkout: self
    persistCredentials: true
  - task: Bash@3
    displayName: "Create tag"
    name: "create_tag"
    inputs:
      targetType: "inline"
      script: |
        git config --global user.name "BuildService"
        git config --global user.email "[email protected]"
        git tag -a v0.0.1-dev -m "Development Release"
        git push --tags
That is it for the template, and we can now reference it in our pipeline:
- template: path/to/template/tag-sources.yml
  parameters:
    tagFormat: v0.0.1-dev
    tagDescription: "Development Release"
That was it for now. See you next time!
// Joachim