Have you ever been annoyed at a project where code is all over the place? Inconsistent naming, mix between spaces and tabs, some functions defining return types while others do not? Well, worry no more! Linters are here to save the day!
Working as a consultant I find myself working on all kinds of projects, of all ages and in all sorts of languages. Meeting projects developed by several different companies or developers can be a challenge. It is no secret that every developer has their style of coding, including everything from naming, spacing, and structure of code.
In this post, we will take a look at some useful tools to help you maintain a cleaner and more consistent code structure. Some of those being ESLint for code files, Prettier for formatting/auto fixing, and Stylelint for style files.
Getting started
As always, the code we will be making here is available on my GitHub. You can clone the repository, or follow along here.
What will we be doing?
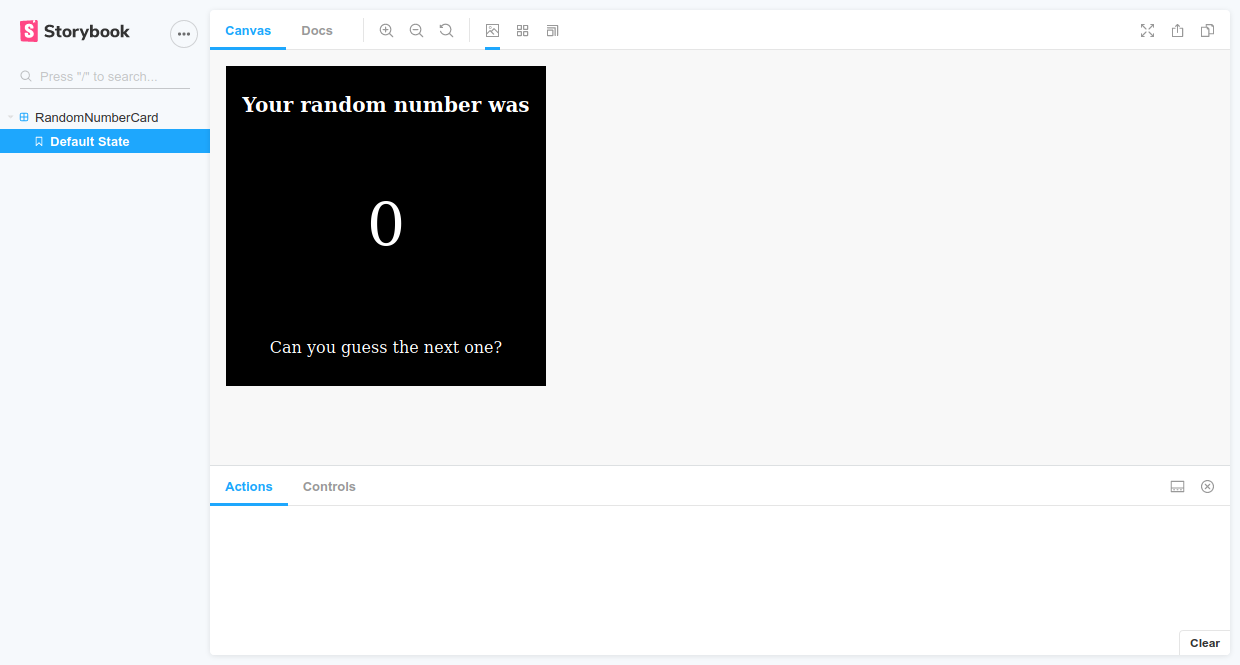
In this post we will be making something simple, a card to guess a random number. Every time we click the card, the number changes.

Setting up our module
The first thing we need to do is to set up our module, let us create a directory, and initialize a new npm package with the following commands:
mkdir random-number-card
cd random-number-card
npm init -y
mkdir src
To keep our repository clean we will also add a .gitignore file to ensure unwanted files do not end up in our repository. For this, we will use the default GitHub file for node.js
# Add gitignore file
wget -O .gitignore https://raw.githubusercontent.com/github/gitignore/master/Node.gitignore

# Install typescript and typings
npm i -D typescript @types/node @types/react

# Install react
npm i -S react

# Initialize typescript
tsc --init
The last command will generate a tsconfig.json file in your root directory, update this to contain the following:
{
  "compilerOptions": {
    "outDir": "build",
    "target": "es5",
    "module": "commonjs",
    "strict": true,
    "esModuleInterop": true,
    "jsx": "react"
  }
}
Now, create the files so your project structure matches the following and update the contents of the files:
--- random-number-card
    --- src
        --- styles
            - main.css
        - RandomNumberCard.tsx
    - package.json
    - package-lock.json
    - .gitignore
src/RandomNumberCard.tsx
import * as React from "react";
import "./styles/main.css";

const RandomNumberCard = () => {
  const [rndNumb, setNum] = React.useState(0);

  return (
    <div
      className="RandomNumberCard"
      onClick={() => {
        const num = Math.floor(Math.random() * 100);
        setNum(num);
      }}
    >
      <h1 className="RandomNumberCard__title">Your random number was</h1>
      <p className="RandomNumberCard__number">{rndNumb}</p>
      <p>Can you guess the next one?</p>
    </div>
  );
};

export default RandomNumberCard;
src/styles/main.css
.RandomNumberCard {
  height: 300px;
  width: 300px;
  background-color: black;
  color: white;
  display: flex;
  flex-direction: column;
  justify-content: center;
  align-items: center;
  padding: 10px;
}
.RandomNumberCard:hover {
  cursor: pointer;
}
.RandomNumberCard__number {
  font-size: 60px;
}

.RandomNumberCard__title {
  font-size: 20px;
  font-weight: bold;
}
Setting up storybook
This might be a bit out of the scope of this post and not needed, but we will do it to save some time on other configurations. We will be setting up Storybook, a tool for developing UI components in isolation. Storybook will allow us to quickly visualize and test our components. If you do not want to do this section, you can skip as it is not necessary for the rest of the post.
Storybook is a quick setup. To set it up run the command npx sb init and the Storybook CLI will do most of the job. Now delete everything in the src/stories folder, and add a new file RandomNumberCard.stories.tsx with the following content:
import React from "react";
import { Story, Meta } from "@storybook/react/types-6-0";
import RandomNumberCard from "../RandomNumberCard";

export default {
  title: "RandomNumberCard",
  component: RandomNumberCard,
} as Meta;

const Template: Story = (args) => <RandomNumberCard {...args} />;

export const DefaultState = Template.bind({});
DefaultState.args = {};
Storybook should automatically have added a new script to your package.json file that you can use to start Storybook. If you want to run Storybook and test our component out, you can open a terminal window and run the command npm run storybook. Storybook will start up and you should see something like:
Setting up linting in our app
Now it is time to install the modules that will help us lint our module. Below you will find a table of the modules with a short description of their purpose.
| Package | Description |
|---|---|
| @typescript-eslint/eslint-plugin | ESLint plugin that provides linting rules for TypeScript code |
| @typescript-eslint/parser | ESLint parser that allows ESLint to work with TypeScript |
| eslint-config-prettier | Plugin to disable conflicting or unnecessary prettier rules |
| eslint-plugin-prettier | Allows running prettier as an ESLint rule |
| eslint-plugin-simple-import-sort | Plugin to autofix import sorting |
| eslint-plugin-react | React linting rules |
| eslint | ESLint is a static code analysis tool to detect problems i JavaScript code |
| prettier | Prettier is a code formatting tool |
| stylelint | Linter for CSS files |
| stylelint-config-standard | Standard config for stylelint |
| stylelint-config-recommended | Turns on all stylelint rules |
| stylelint-config-recess-order | Order/Sort CSS properties the Recess way |
To install all these modules, run the command:
npm i -D prettier eslint eslint-plugin-simple-import-sort eslint-plugin-prettier eslint-config-prettier \
@typescript-eslint/parser @typescript-eslint/eslint-plugin stylelint stylelint-config-standard \
stylelint-config-recommended stylelint-config-recess-order
We have our modules installed, and now it is time to configure them to fit our needs. With that said, ESLint offers a large number of rules as well does Prettier. The rules we will be setting up is how I like to have it configured, but I highly suggest you do some searching of your own to figure out what works best for your project. I am not going to go into details about the configuration, because that makes this post to long and the details do not really matter that much. Most likely you will end up changing them to fit your project.
First, we will set up our .eslintrc.json file. This file contains all the rules for ESLint. Create this file with the following content:
{
  "parser": "@typescript-eslint/parser",
  "parserOptions": {
    "project": "./tsconfig.json",
    "ecmaFeatures": {
      "jsx": true
    },
    "ecmaVersion": 2018,
    "sourceType": "module"
  },
  "plugins": ["@typescript-eslint", "simple-import-sort"],
  "extends": [
    "prettier",
    "prettier/react",
    "eslint:recommended",
    "plugin:react/recommended",
    "prettier/@typescript-eslint",
    "plugin:@typescript-eslint/eslint-recommended",
    "plugin:@typescript-eslint/recommended"
  ],
  "rules": {
    "@typescript-eslint/explicit-member-accessibility": "off",
    "@typescript-eslint/no-explicit-any": "off",
    "@typescript-eslint/no-unused-vars": "off",
    "@typescript-eslint/no-submodule-imports": "off",
    "@typescript-eslint/no-unused-expressions": "warn",
    "@typescript-eslint/no-use-before-define": "off",
    "@typescript-eslint/jsx-no-lambda": "off",
    "@typescript-eslint/prefer-interface": "off",
    "@typescript-eslint/interface-name-prefix": "off",
    "@typescript-eslint/camelcase": "off",
    "simple-import-sort/sort": "warn",
    "no-console": "off",
    "sort-keys": "off"
  },
  "env": {
    "browser": true,
    "es6": true
  }
}
![]() You could also include a
You could also include a .eslintignore or .stylelintignore file for any files you would like ESLint/Stylelint to ignore.
and our .prettierrc
{
  "printWidth": 100,
  "singleQuote": true,
  "semi": true,
  "tabWidth": 2,
  "trailingComma": "none",
  "useTabs": false,
  "arrowParens": "avoid"
}
lastly, I am going to create our .stylelintrc file
{
  "extends": ["stylelint-config-recommended", "stylelint-config-recess-order"]
}
![]() If you are using Visual Studio Code as your editor, I highly suggest you install the ESLint, Stylelint, and Prettier extensions to get these warnings and functionality directly in the ‘Problems’ pane of VSCode.
If you are using Visual Studio Code as your editor, I highly suggest you install the ESLint, Stylelint, and Prettier extensions to get these warnings and functionality directly in the ‘Problems’ pane of VSCode.
The configuration is now in place and well add some new scripts to our package.json file to run them. Add these five lines to your file under the scripts section. The first two will only display the issues found, the next two will attempt to auto fix any auto fixable issues while the last one will run both our linters at the same time.
  "lint:styles": "npx stylelint '**/**.css'",
  "lint:ts": "eslint src/**/*.tsx src/*.tsx",
  "lint:styles:fix": "npx stylelint '**/**.css' --fix",
  "lint:ts:fix": "eslint src/**/*.tsx src/*.tsx --fix",
  "lint": "npm run lint:styles && npm run lint:ts"
Let us see how the code we added earlier is doing. First run npm run lint:ts and then npm run lint:styles (alternatively just run npm run lint). You should see an output something like this:
> eslint src/**/*.tsx src/*.tsx


src/RandomNumberCard.tsx
  1:1   warning  Run autofix to sort these imports!  simple-import-sort/sort
  4:26  warning  Missing return type on function     @typescript-eslint/explicit-module-boundary-types

✖ 2 problems (0 errors, 2 warnings)
  0 errors and 1 warning potentially fixable with the `--fix` option.
> npx stylelint '**/**.css'


src/styles/main.css
 3:3  ✖  Expected "width" to come before "height"                  order/properties-order
 5:3  ✖  Expected "color" to come before "background-color"        order/properties-order
 6:3  ✖  Expected "display" to come before "color"                 order/properties-order
 9:3  ✖  Expected "align-items" to come before "justify-content"   order/properties-order
Here we can see that it found two issues linting our React files and four issues in our CSS file. We can try to auto fix these issues running npm run lint:ts:fix and npm run lint:styles:fix. If we then run the same commands again we should see it was able to fix five out of six issues:
> eslint src/**/*.tsx src/*.tsx


src/RandomNumberCard.tsx
  3:33  warning  Missing return type on function  @typescript-eslint/explicit-module-boundary-types

✖ 1 problem (0 errors, 1 warning)
This was one issue it was unable to fix automatically, so let us fix this ourselves. We will add the return type to the component in the RandomNumberCard.tsx like this:
export const RandomNumberCard = () : React.ReactElement => {
If we now run the command npm run ts:lint for a third time we can see that no issues are found! Our code is now following the rules set by us in our configuration and we can proceed.
Prettier
I am using prettier as VSCode plugin. You can also auto format all your files using the Prettier CLI with the command prettier --write "src/**/*.tsx" "src/*.tsx" "**/**.css" More on the prettier CLI can be found here
Run linters in our pipeline
Having linting enabled in our app will do no good if we do not enforce it. There are several ways we can enforce it:
Git hooks
Adding the linting to our repositories git commit hook would run it and abort the commit if our rules are not followed. Although it is an unlikely situation, the hook could be removed from the local git directory by a developer, or fail to run for various reasons.
![]() Hooks are programs you can place in a hooks directory to trigger actions at certain points in git’s execution - githooks Documentation
Hooks are programs you can place in a hooks directory to trigger actions at certain points in git’s execution - githooks Documentation
Pipeline
Running the linting in our pipeline would ensure everything happens server-side and there are fewer opportunities for failures. We could set the pipeline to fail if our linting fail, and restrict merging to required successful builds. The following pipeline configuration gives one example of a validation only pipeline and illustrates the few steps needed to enforce our linting rules:
trigger:
  - master

pool:
  vmImage: "ubuntu-latest"

steps:
  - task: NodeTool@0
    inputs:
      versionSpec: "10.x"
    displayName: "Install Node.js"
  - task: Npm@1
    displayName: "npm install"
    inputs:
      command: "install"
  - task: Npm@1
    displayName: "Lint files"
    inputs:
      command: "custom"
      customCommand: "run lint"
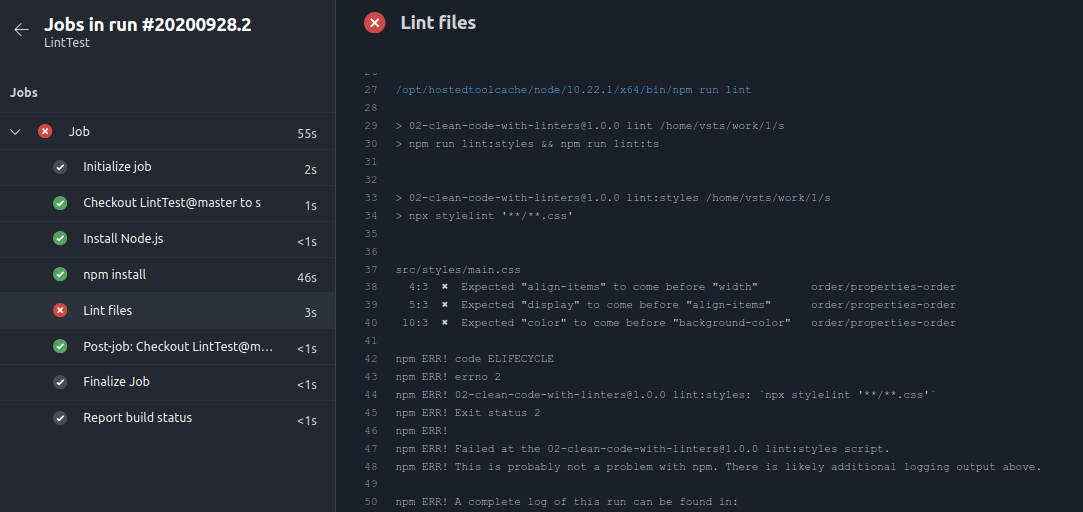
The main job here is done by our Lint files step, this will automatically break the build if our files are not up to code. I reverted some of the changes we had done before running the pipeline, and this was the result:
Reflection
So, in this post we create a custom React module, we ensure our code is kept clean using linters and we ensured that this was enforced during the build. As mentioned previously, ESLint and Stylelint comes with a vast majority of rules allowing you full control over your code. It will be up to you to configure it correctly for your project. In one of the next posts, we will extend to implementing some simple tests and ensuring code coverage is kept at an acceptable level.
See you next time!
// Joachim
Changes after publish
2020-10-02: Clearified some usages of prettier